Hi Everyone,
I'll be demonstrating Oracle Database Adapter in today's tutorial.Oracle JCA adapter for DB enables a BPEL process to communicate with Oracle databases or third party databases through JDBC. The Oracle Database Adapter service is defined within a BPEL process partner link by using the Adapter Configuration Wizard of Oracle BPEL Process Manager (Oracle BPEL PM).
There are number of operations avilable that you can perform with DB adapter namely :
Uscase Scenario: We will be using DB table for polling new records and updating the same table with some field.To execute thiw we will use one inbound DB adapter,polling for new records.One outbound adapter for updating records in a table.BPEL process that will contain our process logic.
At run time, the location is used to look up the adapter instance which executes the service. Based on the properties in the db.jca file and the linked or-mappings.xml file, <seviceName>.properties file generates the correct SQL to execute, parses the input XML, and builds an output XML file matching the XSD file. To execute the SQL, it obtains a pooled SQL connection from the underlying data source.
Lets start with the tutorial:
Step1: Create one sample table which will be used in our tutorial.I have created "TB_USERS" table and inserted some records in it.Kindly observe the value of "ReadFlag".Its significance will be discussed later on.

 Step2: Drag and drop DB adapter from service adapters onto the exposed services lane
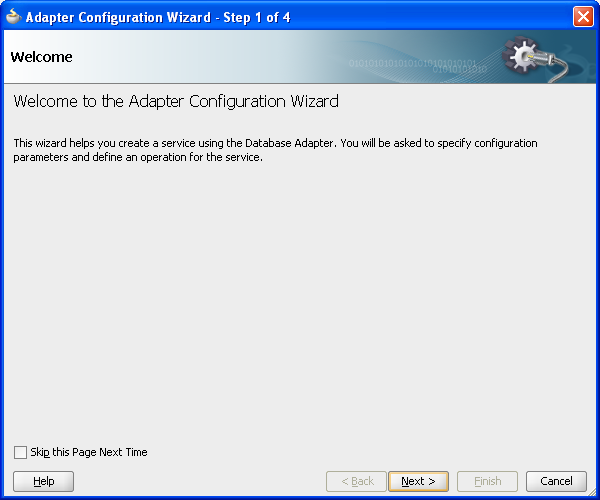
 Step3: DB Adapter configuration wizard will open up.Click next.
 Step4: Give the service name as "PollerDB".
 Step5: In the next window give the connection details.I presumed you guys have already created a DB connection.If not,kindly create one and use here.
 Step6: Select "Poll for New or Changed Records" as a operation type.It is an inbound operation which polls for new records in a table or whenever existing records are changed.
 Step7: In next window,we will import our table from database.Click on import tables.
 Step8: Search for your table using Name Filter and Query,and then move it to selected section by clicking on the arrow.
 Step9: Our table will be imported and shown in next window.
 Step10: DB adapter requires a primary key in a table to uniquely identify a row in atable.Since while creating table we haven't created any primary key,select "FName" as primary key and move next.
 Step11: We are working on single table only.No need to define relationships,move next.
 Step12: Select the database columns that you want to query from table.I have selected all of them.
 Step13: Next window will ask you to choose an operation that will be performed when a record is read.Select Logical Delete option.This operation employs the logical delete polling strategy. This strategy involves updating a special field on each row processed and updating the WHERE clause at run time to filter out processed rows. It mimics logical delete, wherein applications rows are rarely deleted but instead a status column isDeleted is set to true. The status column and the read value must be provided, but the modified WHERE clause and the post-read update are handled automatically by the Oracle Database Adapter.
 Step14: If you go back I have created one field "ReadFlag" in the table and given value as "N" for all the records.This field will act as logical delete field.DB adapter will poll for all records having unread value (N in our case) and after processing will update the value of this field to Read Value (P in our case) after successful read.
 Step15: In the next window set the values for Polling frequency,DB Rows per transaction.Also check Distributed Polling as distributed polling is used to ensure that the same data is not retrieved more than once.
 Step16: Next window no change is required .Click next.
 Step17: Next.
 Step18: Finish.We have configured our DB adapter for polling records from a table.
 Step19: Now,to write records to the same table,drag and drop one more DB adapter this time to external references lane.Give the service name as "WriteDB".
 Step20: Same way we did for polling adapter,choose DB connection and click next.
 Step21: Under operation type,choose "Update Only" ,since we will update the value of FullName only without modification in other column values.
 Step22: Import Table.
 Step23: Define Primary Key.
 Step24: Since we are going to update the value for "fullname" field only.Choose fullname and click next.
 Step25: Next and finish.
 Step26: Drag and drop BPEL component onto the components lane and choose Define Interface Later Template and finish.
 Step27: Wire both polling adapter and adapter for writing records with BPEL by dragging and dropping wires to BPEL component.
 Step28: Drag and drop receive activity and link it with Polling adapter partner link.Configure receive activity and create input variable for this activity.If you dnt know how to work with and configure receive activity ,kindly refer to my initial blogs.In that I have explained in detail about using receive activity.
 Step29: Likewise,drag and drop invoke activity to invoke Write DB adapter.In the same way create input variable for invoking DB adapter.
 Step30: As of now your BPEL process will look like this.
 Step31: Now drag and drop assign activity between receive and invoke activity.We will populate the input variable for invoking DB adapter in this assign activity.Map the first name field from receive input variable to invoke DB adapter input variable.And for full name use expression builder to concatenate the Fname and lname from Input and map it with Fullname field of invoke DB adapter input variable.

 Step32: Save all and deploy your composite on EM
 Step33: We have set the polling frequency to 10 seconds,so after that interval out interface will poll for new records at regular interval.Click open one composite.
 Step34: Observe the input payload that is received using pollign adapter and the invoke activity input variable for invoking the Write DB adapter.
 Step35: Now to verify the records are also updated in table,go back to your DB and open up your table.Fullname column is populated with values and also observe the value of read flag "P". Now poller will not poll for any records anymore as no record exists with value "N".It will poll again when some new records are inserted in the database or existing records ReadFlaf value is set back to "N".
 Thats it guys.Hope you guys have understood the concept ob DB adpater in Oracle SOA Suite 11G,its use and configuration.In the coming tutorial I'll be posting blogs on using other operations of DB adapter as well.
If you guys have any concerns,coubts or issues ,please feel free to contact me by commenting here or emailing me.I'll get back with the reply at earliest.Also,if you guys need blog specific to topic you want to undertand,I Will be happy to do that as well.Till then take care
Happy Learning,
Cheers
I'll be demonstrating Oracle Database Adapter in today's tutorial.Oracle JCA adapter for DB enables a BPEL process to communicate with Oracle databases or third party databases through JDBC. The Oracle Database Adapter service is defined within a BPEL process partner link by using the Adapter Configuration Wizard of Oracle BPEL Process Manager (Oracle BPEL PM).
There are number of operations avilable that you can perform with DB adapter namely :
- Call a Stored Procedure or Function :Select this option if you want the service to execute a stored procedure or function.
Perform an Operation on a Table: Select this option for outbound operations. You can select Insert or Update, Insert Only, Update Only, Delete, Select, or any combination of the six.
Poll for New or Changed Records in a Table: Select this option for an inbound operation (that is, an operation that is associated with a Receive activity). This operation type polls a specified table and returns for processing any new rows that are added. You can also specify the polling frequency.- Execute Pure SQL: Useful when dealing with arbitrarily complex statements, aggregate queries (result is not row-based), and XMLType columns.
Uscase Scenario: We will be using DB table for polling new records and updating the same table with some field.To execute thiw we will use one inbound DB adapter,polling for new records.One outbound adapter for updating records in a table.BPEL process that will contain our process logic.
Before starting the lab,I would like to explain dirrerent types of files that are being created while configuring DB adapter
- <serviceName>.wsdl: This is an abstract WSDL, which defines the service end point in terms of the name of the operations and the input and output XML elements.
- <serviceName>_table.xsd: This contains the XML file schema for these input and output XML elements. Both these files form the interface to the rest of the SOA project.
- <serviceName>_or-mappings.xml: This is an internal file. It is a TopLink specific file, which is used to describe the mapping between a relational schema and the XML schema. It is used at run time.
- <serviceName>_db.jca: This contains the internal implementation details of the abstract WSDL. It has two main sections, location and operations. Location is the JNDI name of an adapter instance, that is, eis/DB/SOADemo. Operations describe the action to take against that end point, such as INSERT, UPDATE, SELECT, and POLL. The contents of the db.jca file are wholly determined by choices made while running the Adapter Configuration Wizard.
- <serviceName>.properties: This is also an internal file. It is created when tables are imported, and information about them is saved. It is used only at design time.
At run time, the location is used to look up the adapter instance which executes the service. Based on the properties in the db.jca file and the linked or-mappings.xml file, <seviceName>.properties file generates the correct SQL to execute, parses the input XML, and builds an output XML file matching the XSD file. To execute the SQL, it obtains a pooled SQL connection from the underlying data source.
Lets start with the tutorial:
Step1: Create one sample table which will be used in our tutorial.I have created "TB_USERS" table and inserted some records in it.Kindly observe the value of "ReadFlag".Its significance will be discussed later on.


If you guys have any concerns,coubts or issues ,please feel free to contact me by commenting here or emailing me.I'll get back with the reply at earliest.Also,if you guys need blog specific to topic you want to undertand,I Will be happy to do that as well.Till then take care
Happy Learning,
Cheers


