Hi Guys,
Sometimes there is requirement where you are required to set some JMS header values and then send the jms message to the client or consumer may interact with you via jms queue and sends some user defined properties in the JMS header.In BPEL 11G, we can easily set or retreive these values.
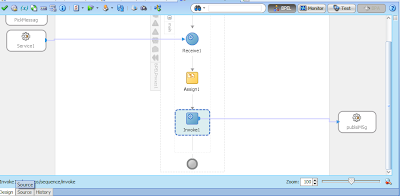
Step1: Click on the invoke activity inside your BPEL process that is calling your JMS adapter for publishing messages in the jms queue.Then click on the source tab of BPEL.
 Step2: Inside the invoke activity code add this property <bpelx:inputProperty name="jca.jms.JMSProperty.propertyname" variable="variablename"/>
where propertyname: name of the property you want to set and variablename: variable from which you are passing value to this property.For instance,in out usecase I am setting following properties:
<bpelx:inputProperty name="jca.jms.JMSProperty.MSG_ID" variable="TransID"/>
<bpelx:inputProperty name="jca.jms.JMSProperty.FROM_SYSTEM" variable="FROM_SYSTEM"/>
<bpelx:inputProperty name="jca.jms.JMSProperty.ServiceName" variable="ServiceName"/>
Make sure you populate all these properties before calling invoke activity,otherwise these properties will contain null/blank values.
 Step3: Deploy and test your code.Verify that these values are getting set by looking into the flow trace of your composite.
 Step4: Also,you can verify the message in jms queue as well and see if the properties are properly set or not.

Step5:Inside your BPEL process,click on the receive activity that is receiving input from the jms adapter and click on source.
 Step6: Add this property inside your receive activity: <bpelx:outputProperty name="jca.jms.JMSProperty.propertyname" variable="variablename"/>. It is same as we did for setting the property except the outputProperty tag.In my example, I am retreiving the value of jms header that I set previously.
<bpelx:outputProperty name="jca.jms.JMSProperty.MSG_ID" variable="TransID"/>
<bpelx:outputProperty name="jca.jms.JMSProperty.FROM_SYSTEM" variable="FROM_SYSTEM"/>
<bpelx:outputProperty name="jca.jms.JMSProperty.ServiceName" variable="ServiceName"/>
Create the variables that will store the values of these properties.
 Step7: Deploy your code and test your composite.Inside flow trace verify you are able to retreive the jms properties headers value from the JMS message.
 In this way you guys can set and get the header properties of any JMS message in SOA 11G.Apart from accessing these values from BPEL,you can also access these values from Mediator.In mediator, they are accessed in the assign step using:
Inbound: $in.property.jca.jms.JMSProperty.<propertyname>
Outbound: $out.property.jca.jms.JMSProperty.<propertyname>
Hope this post of some help to you.
Happy Learning,
Cheers !!!
Sometimes there is requirement where you are required to set some JMS header values and then send the jms message to the client or consumer may interact with you via jms queue and sends some user defined properties in the JMS header.In BPEL 11G, we can easily set or retreive these values.
Setting JMS Header Values
Step1: Click on the invoke activity inside your BPEL process that is calling your JMS adapter for publishing messages in the jms queue.Then click on the source tab of BPEL.

where propertyname: name of the property you want to set and variablename: variable from which you are passing value to this property.For instance,in out usecase I am setting following properties:
<bpelx:inputProperty name="jca.jms.JMSProperty.MSG_ID" variable="TransID"/>
<bpelx:inputProperty name="jca.jms.JMSProperty.FROM_SYSTEM" variable="FROM_SYSTEM"/>
<bpelx:inputProperty name="jca.jms.JMSProperty.ServiceName" variable="ServiceName"/>
Make sure you populate all these properties before calling invoke activity,otherwise these properties will contain null/blank values.


Getting JMS Header Values
Step5:Inside your BPEL process,click on the receive activity that is receiving input from the jms adapter and click on source.

<bpelx:outputProperty name="jca.jms.JMSProperty.MSG_ID" variable="TransID"/>
<bpelx:outputProperty name="jca.jms.JMSProperty.FROM_SYSTEM" variable="FROM_SYSTEM"/>
<bpelx:outputProperty name="jca.jms.JMSProperty.ServiceName" variable="ServiceName"/>
Create the variables that will store the values of these properties.


Inbound: $in.property.jca.jms.JMSProperty.<propertyname>
Outbound: $out.property.jca.jms.JMSProperty.<propertyname>
Hope this post of some help to you.
Happy Learning,
Cheers !!!


